前言
在日常的开发中,UI为了让界面更加吸引人往往会在界面上用到大量的渐变色。那么在本文中,我们将通过几个案例更好的去了解Flutter中渐变色的使用。让我们开始探索Flutter世界中绚丽多彩的渐变色效果吧!
案例一:渐变色边框
很多时候,一个简单的边框并不能满足我们对于界面的美感要求。我们希望给边框增添一些特殊的效果,让它更加引人注目和独特。而正是在这种情况下,渐变色边框成为了一个合适的选择。在Flutter中,实现渐变色边框的方式有很多,有简单的,有复杂的。最简单的实现方式呢就是通过两个Container的叠加,例如:
Container(
  height: 48,
  width: 280,
  padding: const EdgeInsets.all(2),
  decoration: BoxDecoration(
      borderRadius: BorderRadius.circular(30),
      gradient: const LinearGradient(
        colors: [Colors.blue, Colors.red],
      )),
  child: Container(
    alignment: Alignment.center,
    decoration: BoxDecoration(
      borderRadius: BorderRadius.circular(30),
      color: Colors.white,
    ),
    child: const Text(
      '渐变色 — Taxze',
      style: TextStyle(
        fontSize: 20,
        fontWeight: FontWeight.bold,
        color: Colors.black,
      ),
    ),
  ),
),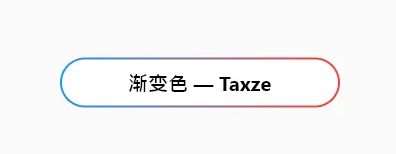
只需要给外层Container加上LinearGradient渐变色,然后加上一个padding,这个padding就是边框的粗细,然后将内部的Container背景设置为白色即可。这种方式非常简单。
但是这种方式呢不够灵活,有局限性,而且可定制性受限,无法对每个边框的渐变进行独立设置。所以对于边框的渐变,更推荐使用CustomPainter来进行绘制。
class GradientBoundPainter extends CustomPainter {
  final List<Color> colors;
  final double width;
  final double height;
  final double strokeWidth;
  const GradientBoundPainter({
    Key? key,
    required this.colors,
    required this.width,
    required this.height,
    this.strokeWidth = 2.0,
  });
  @override
  void paint(Canvas canvas, Size size) {
    //定义矩形的宽高
    final rectWidth = width, rectHeight = height;
    //圆角。必要的话可以将其作为变量传进来
    final radius = 10.0;
    //定义矩形的位置和尺寸
    Rect rect = Offset(
        size.width / 2 - rectWidth / 2, size.height / 2 - rectHeight / 2) &
    Size(rectWidth, rectHeight);
    //RRect.fromRectAndRadius一个具有圆角的矩形
    RRect rRect = RRect.fromRectAndRadius(rect, Radius.circular(radius));
    //绘制
    final paint = Paint()
    //创建线性渐变着色器
      ..shader = LinearGradient(
        begin: Alignment.centerLeft,
        end: Alignment.centerRight,
        colors: colors,
      ).createShader(rect)
      ..strokeWidth = strokeWidth
      //只绘制边框而不填充
      ..style = PaintingStyle.stroke;
    canvas.drawRRect(rRect, paint);
  }
  @override
  bool shouldRepaint(covariant GradientBoundPainter oldDelegate) {
    return oldDelegate.colors != colors;
  }
}
使用起来也很简单
Container(
  width: 200,
  height: 48,
  child: LayoutBuilder(
    builder: (BuildContext _, BoxConstraints bc) {
      return CustomPaint(
        painter: GradientBoundPainter(colors: [
          const Color(0xFFFA709A),
          const Color(0xFFFF8D1A),
        ], width: bc.maxWidth, height: bc.maxHeight),
        // child: SizedBox(),
      );
    },
  ),
);
案例二:TabBar渐变色指示器
TabBar在开发中是一种常用的组件,用于切换不同的内容或功能模块。而为了增强标签栏的可视效果,让用户在界面切换时获得更加流畅和引人注目的体验,市面上的各大app基本上都对TabBar的指示器indicator做了特殊化。而Flutter自带的对indicator样式修改就那么几种,根本不够用啊(连改个长度都要自己自定义)。那么在这个案例中,我们就来研究下,如何自定义绘制一个渐变色的indicator。
indicator需要一个Decoration对象,所以我们首先需要继承于Decoration
class CustomTabIndicator extends Decoration {
}
核心绘制逻辑如下
@override
BoxPainter createBoxPainter([VoidCallback? onChanged]) {
  return _UnderlinePainter(this, onChanged);
}
///决定控制器宽度的方法
Rect _indicatorRectFor(Rect rect, TextDirection textDirection) {
  assert(rect != null);
  assert(textDirection != null);
  final Rect indicator = insets.resolve(textDirection).deflateRect(rect);
  // 希望的宽度
  double wantWidth = this.width;
  // 取中间坐标
  double cw = (indicator.left + indicator.right) / 2;
 //这里是核心代码
  //下划线靠左
  // return Rect.fromLTWH(indicator.left,
  //     indicator.bottom - borderSide.width, wantWidth, borderSide.width);
  //下划线居中
  return Rect.fromLTWH(cw - wantWidth / 2,
      indicator.bottom - borderSide.width, wantWidth, borderSide.width);
}
@override
Path getClipPath(Rect rect, TextDirection textDirection) {
  return Path()..addRect(_indicatorRectFor(rect, textDirection));
}
class _UnderlinePainter extends BoxPainter {
  _UnderlinePainter(this.decoration, VoidCallback? onChanged)
      : assert(decoration != null),
        super(onChanged);
  final CustomTabIndicator decoration;
  ///决定控制器边角形状的方法
  @override
  void paint(Canvas canvas, Offset offset, ImageConfiguration configuration) {
    assert(configuration != null);
    assert(configuration.size != null);
    final Rect rect = offset & configuration.size!;
    final TextDirection textDirection = configuration.textDirection!;
  	//调用 decoration._indicatorRectFor(rect, textDirection) 方法计算出指示器的位置和尺寸,
		//并使用 deflate 方法缩小矩形的大小,以便将边框的一半包含在矩形内。
    final Rect indicator = decoration
        ._indicatorRectFor(rect, textDirection)
        .deflate(decoration.borderSide.width / 2.0);
    final gradient = LinearGradient(
      colors: [Color(0xFFFA709A), Color(0xFFFF8C1A)],
      begin: Alignment.centerLeft,
      end: Alignment.centerRight,
    );
    final Paint paint = decoration.borderSide.toPaint()
      ..shader = gradient.createShader(indicator)
      ..strokeCap = decoration.strokeCap; //这块更改为想要的形状
    canvas.drawLine(indicator.bottomLeft, indicator.bottomRight, paint);
  }
}
使用起来也很简单:
TabBar(
  controller: controller,
  indicator: const CustomTabIndicator(),
  ...
),

以下是一些有趣的例子
案例三:渐变色爆炸粒子
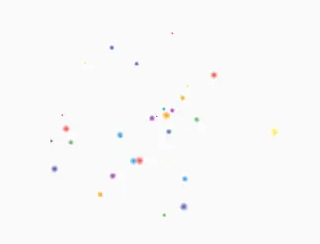
一个会随即生成30个爆炸效果的渐变色粒子。
实现起来也很简单,以下是核心的生成逻辑:
//通过定时器调用生成粒子的函数
_timer = Timer.periodic(Duration(milliseconds: 500), (_) {
  _explode();
});
//随机生成粒子
void _explode() {
    final random = Random();
    _particles.clear();
    for (int i = 0; i < 30; i++) {
      final particle = Particle(
      	//颜色
        color: _colors[random.nextInt(_colors.length)],
      	//角度
        angle: random.nextDouble() * 2 * pi,
      	//距离
        distance: random.nextDouble() * 120,
      	//大小
        size: random.nextDouble() * 8 + 2,
      	//旋转角度
        rotation: random.nextDouble() * 2 * pi,
      );
      _particles.add(particle);
    }
    setState(() {});
}
//渲染
for (final particle in _particles)
    Positioned(
    	//确定粒子在屏幕上的具体位置
      left: particle.distance * cos(particle.angle) +
          MediaQuery.of(context).size.width / 4,
      top: particle.distance * sin(particle.angle) +
          MediaQuery.of(context).size.height / 5,
    	//控制粒子的旋转
      child: Transform.rotate(
        angle: particle.rotation,
        child: Container(
          width: particle.size,
          height: particle.size,
          decoration: BoxDecoration(
            shape: BoxShape.circle,
            gradient: RadialGradient(
              colors: [
                particle.color.withOpacity(1.0),
                particle.color.withOpacity(0.0),
              ],
            ),
          ),
        ),
      ),
    ),
案例四:渐变色加载指示器
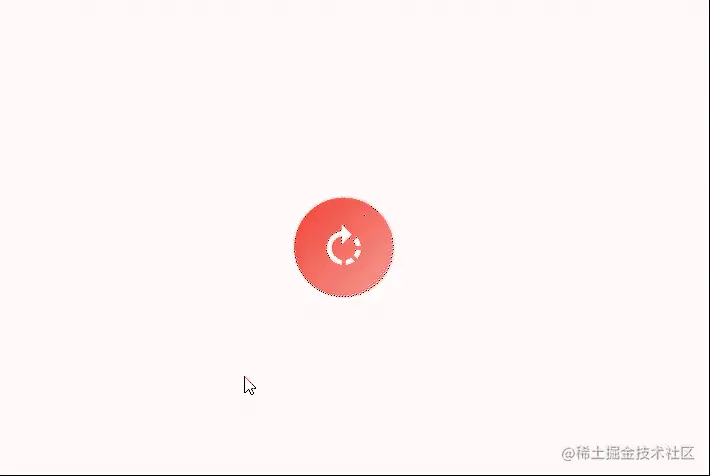
通过Animation和AnimationController来控制旋转和颜色的变化。
核心逻辑
//将动画控制器与颜色过渡动画进行关联
_animation = _animationController.drive(
  ColorTween(
    begin: Colors.red,
    end: Colors.purple,
  ),
);
AnimatedBuilder(
   animation: _animationController,
   builder: (BuildContext context, Widget? child) {
     return Transform.rotate(
       //控制旋转
       angle: _animationController.value * 2 * pi,
       child: Container(
         ...
         decoration: BoxDecoration(
           shape: BoxShape.circle,
           //控制渐变
           gradient: LinearGradient(
             colors: [
               _animation.value!,
               _animation.value!.withOpacity(0.5),
             ],
             begin: Alignment.topLeft,
             end: Alignment.bottomRight,
           ),
         ),
         child: Icon(...),
       ),
     );
   },
 ),
总结
在本篇文章中,我们探讨了几个Flutter中渐变色的相关案例。Flutter提供了丰富的渐变色支持和灵活的定制选项,使我们能够轻松实现各种各样的渐变色效果。无论是用于背景、文本、图标还是边框,渐变色都能为应用程序带来生动、多样和吸引人的视觉效果。希望本篇文章对你理解和运用Flutter中的渐变色相关内容有所帮助,激发你的创造力~
以上就是Flutter中渐变色的使用案例分享的详细内容,更多关于Flutter渐变色的资料请关注寻技术其它相关文章!
